Run AI Vision Lab and read its report
Py Editor for Mac · Direct Developer ID edition · 27.0.2 (32)
Workflow verified 15 September 2026 with Helper 0.5.3.
AI Vision Lab trains a small image classifier on generated vertical, horizontal and diagonal patterns. You can run the example, follow its training results and inspect a visual report without supplying a dataset or an AI service account.
Prepare the example
- Choose File → Recent Projects → 08_AI_Vision_Lab. These steps assume the bundled example appears in your recent projects.
- Make sure Py Editor Helper is running. This workflow was tested with Helper 0.5.3; installing Helper itself is outside this page.
- If the status bar says Project .venv not created, click it and wait for the project environment to be prepared.
- Select main.py and leave the run selector at Current Selected File.
- Click the green Run triangle.
- If Run reports missing project dependencies, click Install Dependencies and wait for Project dependencies installed. Run the file again.
The project uses PyTorch, NumPy and Matplotlib. Package setup requires a download; training uses the locally generated dataset. Our run used a project environment with Python 3.14.6. Do not change your system Python just to match this screenshot.
Run and inspect the results
- If dependency installation was needed, select main.py and click Run again. If the first run already completed successfully, use its results instead; there is no need to train twice just to follow this guide.
- Wait for the ten training epochs to finish.
- Read the final test accuracy and confusion matrix in Results → Run.
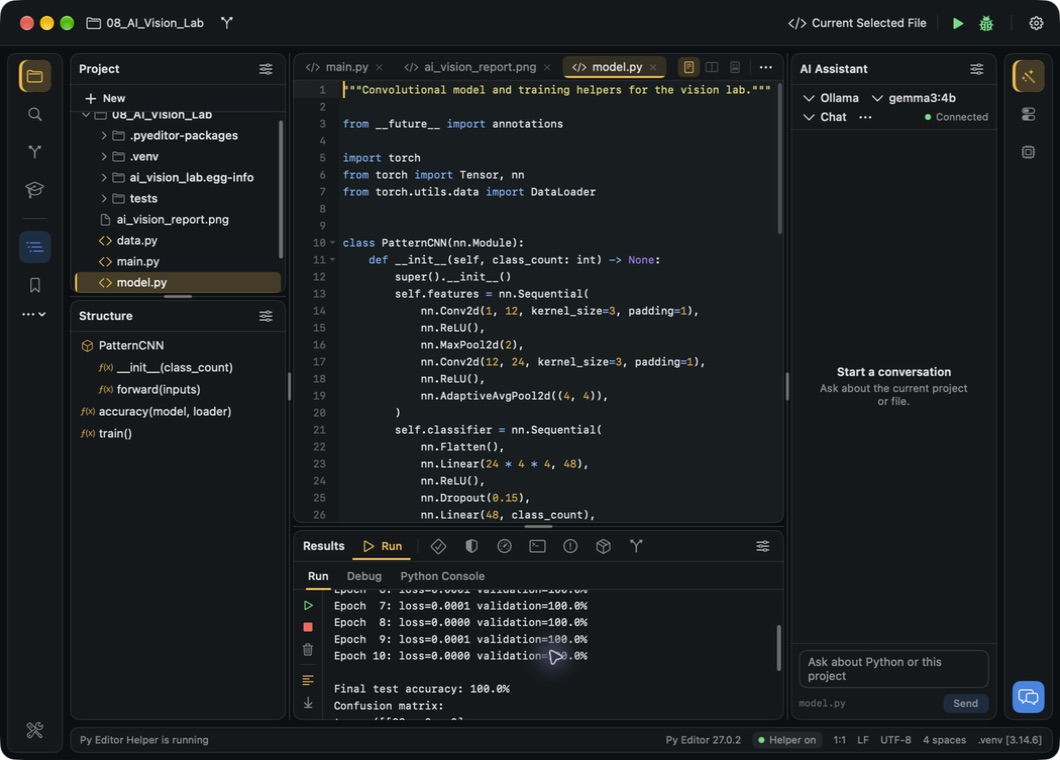 Open the screenshot to view it at full size.
The screenshot shows model.py opened for inspection after main.py finished. To repeat training, select main.py again before clicking Run.
The displayed 100% test result belongs to this small generated dataset. It is not a benchmark or a guarantee of accuracy on real-world images. The first run may also display a Matplotlib font-cache message.
If you need to stop before completion, use Stop active execution in the top toolbar, as described in Run and output. An existing report file is not proof that the latest run completed: read that run's final output before treating the report as its result.
Open the visual report
- In the Project panel, right-click the 08_AI_Vision_Lab folder.
- Choose Reload from Disk to refresh the file list.
- Right-click ai_vision_report.png and choose Open In → Finder.
- With the report selected in Finder, press Command-O. On the test Mac it opens in Preview.
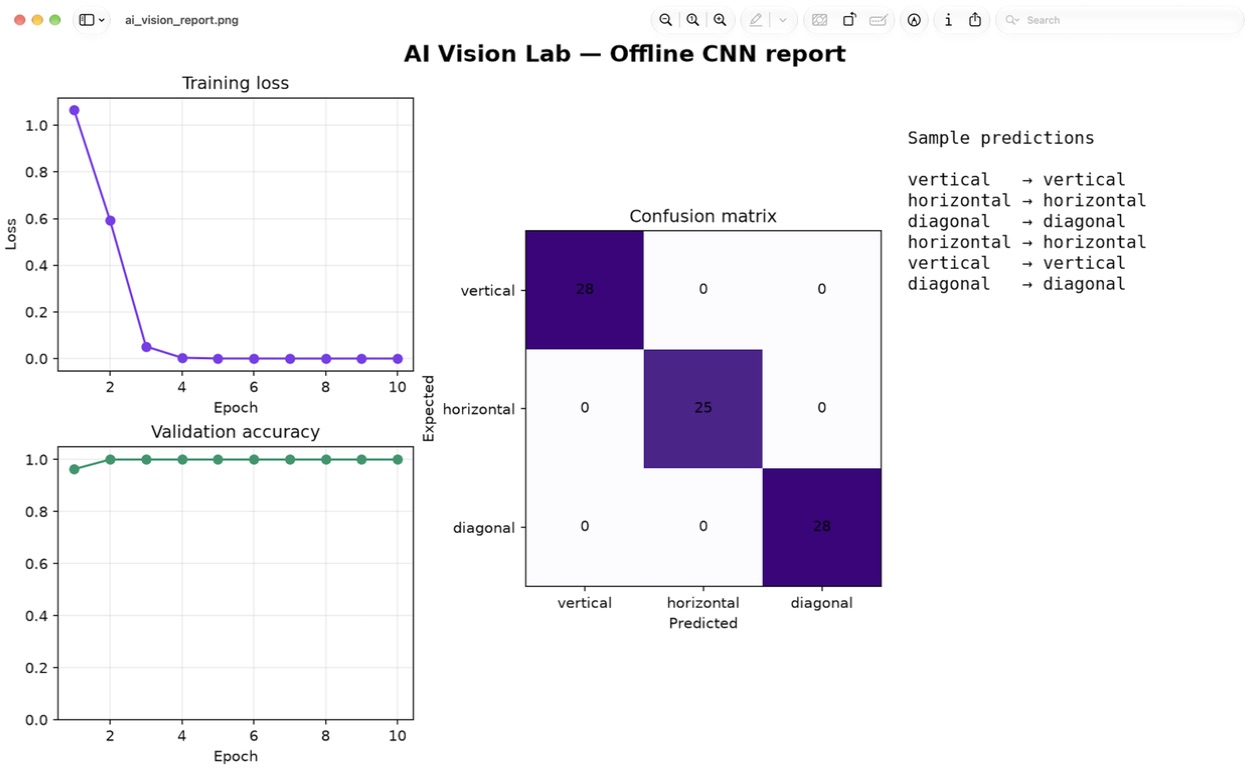 Open the screenshot to view it at full size.
This is the generated report displayed in macOS Preview, not an image preview inside Py Editor. In the tested build, clicking the PNG directly in Py Editor displayed “Unable to read ai_vision_report.png”; the Finder route above was verified instead.
Understand the four panels
- Training loss: how the training error changed across epochs.
- Validation accuracy: the fraction of validation patterns classified correctly.
- Confusion matrix: expected classes are rows and predicted classes are columns. Values on the diagonal are correct predictions.
- Sample predictions: a few expected and predicted labels side by side.
Keep the example unchanged for your first run. Once you can reproduce the report, inspect data.py for the generated patterns and model.py for the classifier and training functions.